Urban Modern Project: Starting a New Build Home
THE DESIGN INSPIRATION AND PROCESS
So the good news is that you have a lot and you are going to build your new home. Congratulations!! This is an exciting decision but where do go from here? There are several steps involved to achieving your dream home. There are a lot of details to review and decisions to make, but it’s all worth it in the end. We are going to walk you through the process of building a new house start to finish using our Urban Modern project, located in the heart of Austin, as an example.
-Space Planning-
If you are building new or doing a major renovation or addition, you’ll usually begin the process with engaging an architect to start with drawing process. They will handle the floor plans, architectural elevations, power and site plans for starters. You will work through the programming of your wish lists (i.e. how many bedrooms, bathrooms, office, etc.) and the site conditions to see what it possible.
This is also a great time to bring in an interior designer. The earlier you can engage with a designer, the better. While sometimes not always possible, it is beneficial to bring on a designer during this time because they are the ones with you through the very end of the project. Designers can help you think through strategic cabinet designs, furniture layouts, power needs and the functionality that goes beyond simple furnishings and decor. Our job as designers is to think through the end use of every space and tailor it to our client’s needs and while the floor plan is still in flux, is the perfect time to talk through those decisions so that the space planning is right the first time and you avoid having to make costly changes during construction.
-Planning our Urban Modern Project-
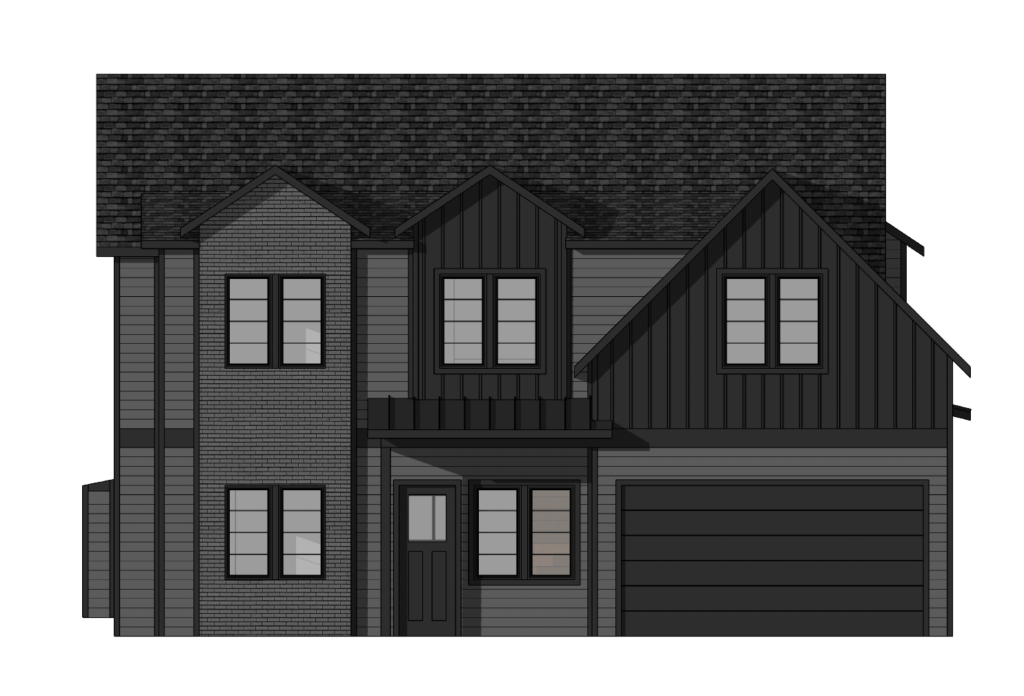
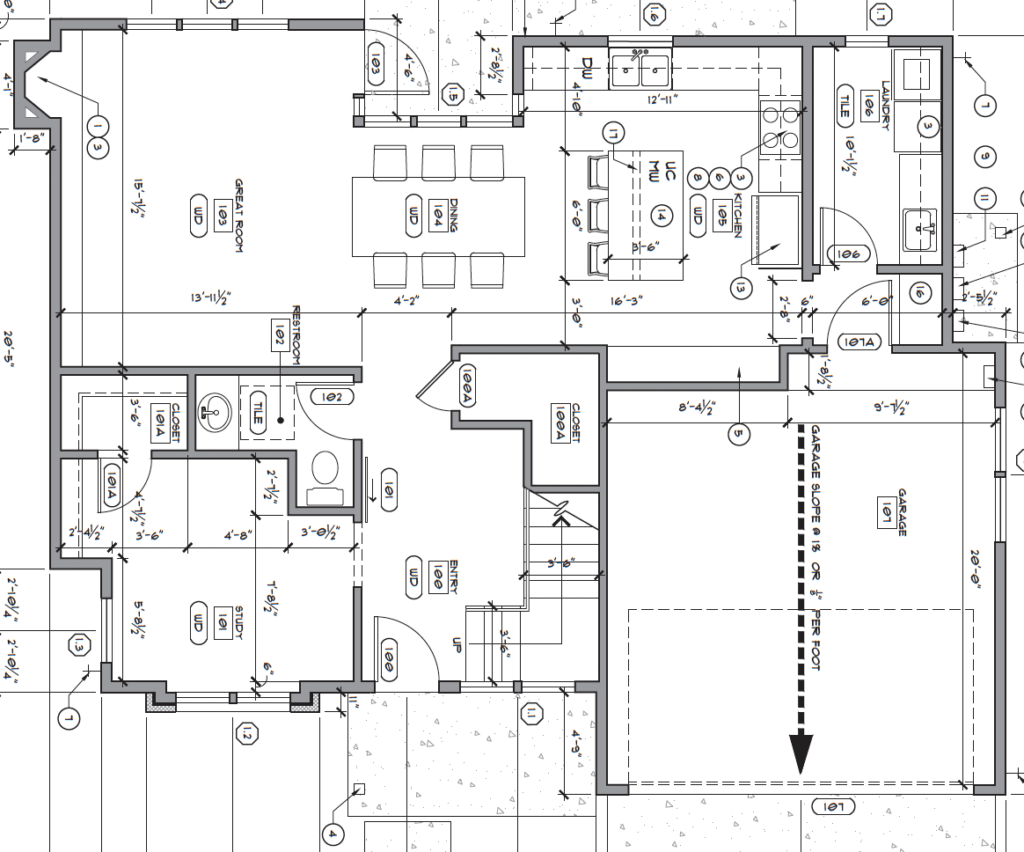
For what became our Urban Modern project in Austin, we met with the architect to work through the exterior feel of the home and the floor plan design. The list of requirements was long and the lot size was small so we had to get very creative to achieve the final layout. The final size of the house you can build depends on the size of your lot so in this case, we could only go so big and thus had to make a list of priorities of what was a must vs a nice to have.
Top priorities for us in any of our new build designs (when we are brought into the project early enough) is having as much natural light as possible, maximizing storage and having the flow from room to room feel very open. We ideally wanted to have both a home office space and a dining room. Unfortunately we did not have the footprint to get both. We opted for the home office that could also double as a guest room if needed. It took a few iterations to achieve the final floor plan and exterior design that everyone loved but once we were done, we were excited for the next steps.
-The Design-
All new design projects begin with imagery. It is important to get a feel of the overall aesthetic you are wanting to create and the best way to do that is to source imagery. Google, Pinterest, Houzz are great places to start your search. As a rule, we also do not limit our search to images of interiors. We are searching for a feeling, looking at textures, looking at colors. We save anything that sparks something so if you are curating images for your project and something speaks to you, save it. The editing process comes later.
For this project, we started by collecting ideas and creating a board on Pinterest. There are a variety of platforms to organize images and collect ideas—Pinterest, Houzz, magazine files, but Pinterest is what we use the most. It is just a great organizational tool and it’s completely free. We often ask our clients to send us their links to their Pinterest or Houzz boards so that we can take a look at what speaks to them. This process is important because as a designers, we need to see what our clients are gravitating towards—what they like, what they don’t like and their overall aesthetic. We go through all of the specifics about what elements they like and which ones they don’t in the photos to hone in on their preferences.
-The Editing Process-
The editing process is about pulling it all together. This is where we narrow down the images in a more focused way—looking at the common elements like colors, textures and materials that run throughout the myriad of images. We love printing out our favorite images, laying them out on a table and editing them from there. There is something about moving around, pulling and adding physical photos to create a mood board that we just love! It is also helpful to think of adjectives and descriptive words to think about an overall style or mood of the project to help hone in on a more concrete concept. The design style for this Austin new build needed to be classic and a little bit glamorous with an edge. It is also located in a dense, central neighborhood so we wanted it to have an urban flair to it. Other words that came to mind were modern, bright, fresh, and traditional.
-Concept: Urban Modern-
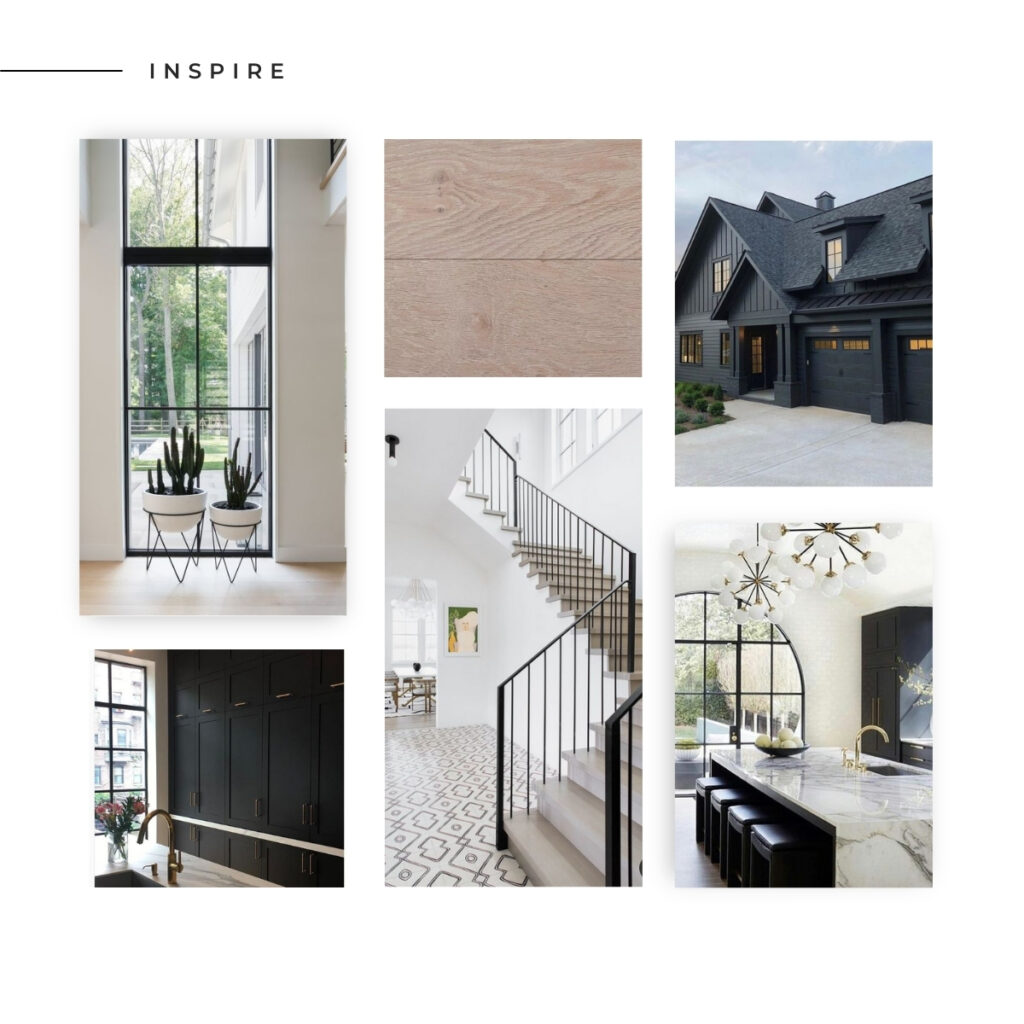
Classic Urban Glamour is the vibe we are going for in this new build project. After selecting the top images that work together, we created a concept board. It is important to include photos that are not just interior design. Fashion, nature, and textural details add variety and interest and evoke a feeling that you’re trying to achieve with the design. You see black and white throughout the board with textural elements like the wood floors and natural stone. We have an image that is fun and glamorous set among classical architectural columns and we have another fashion image that speaks to the downtown/urban vibe we love. Check out our concept board here!
-Finishes-
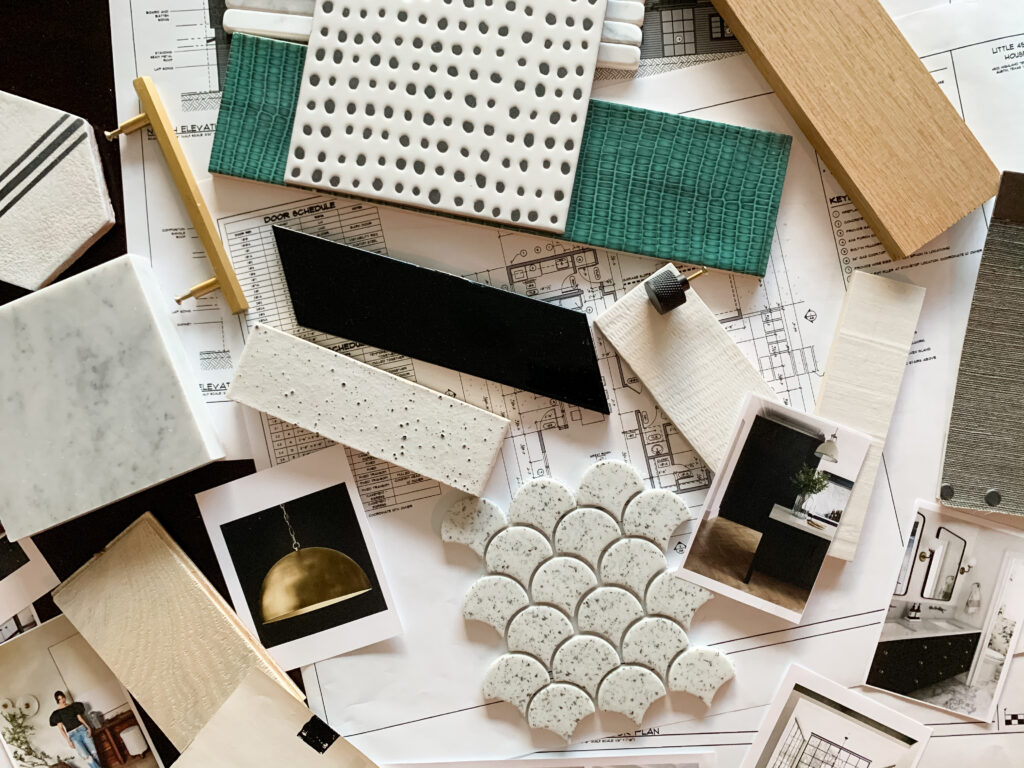
Finishes are how you achieve the overall feel and intent of the design. The finishes pull everything together. What are finishes? They are all of the hard architectural selections that the builder needs to construct the home. This would be the selections for flooring, wood or tile, the paint colors, the lighting, the plumbing, etc. The overall color palette for this project is primarily black and white with gray and various metal accents layered in. We typically do not use the exact same finishes in every room and instead keep a cohesive color palette running throughout to unify the spaces. We introduce various accents and colors to create interest and make each space feel a little unique.
NATURAL STONE
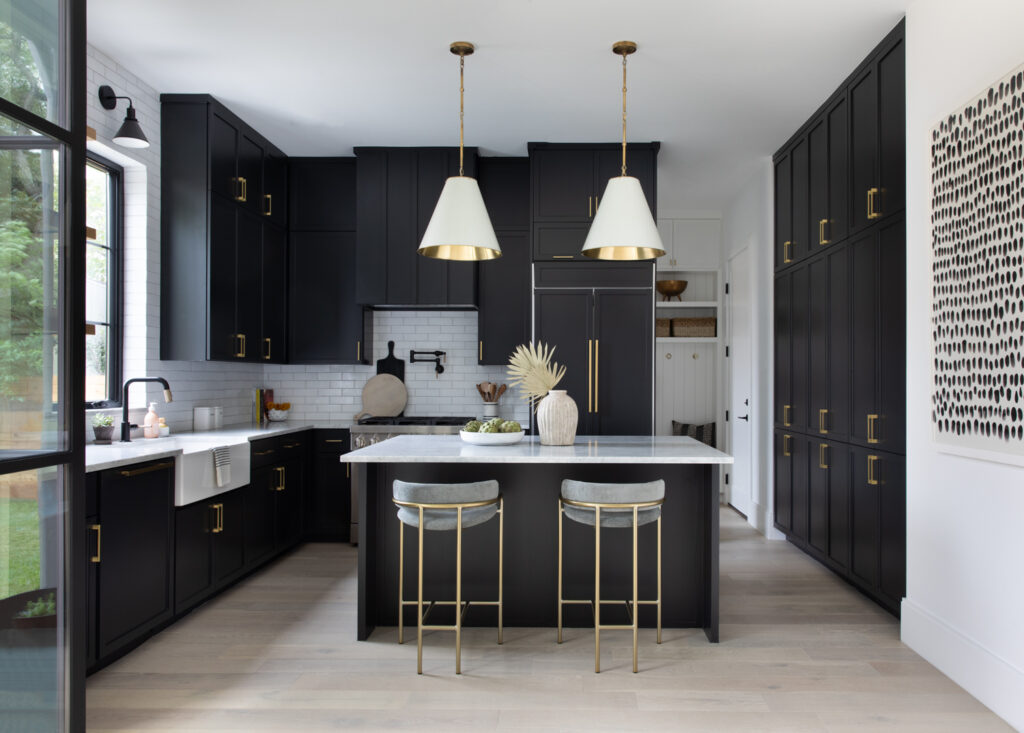
We knew we wanted to bring in natural stone and always wanted a marble for the counters. While marble is a porous stone and requires regular maintenance, you just cannot replicate the veining of marble. It is the perfect material choice for this project—classic and timeless. We wanted drama and high contrast in the kitchen so we are going with black cabinets and a white backsplash. The backsplash ideally needed to have a different texture to it to create contrast against the rest of the smooth surfaces going into the kitchen. So not only will we have contrast in the color palette, we will achieve it through materiality as well.
Another room we would like to introduce natural stone is the primary bathroom. Primary bathrooms are an excellent space to bring in natural stone. It looks beautiful, there is a variety of color options available and several price points to get this luxe look. We landed on using a Carrara marble in this project and love that we carried this tone upstairs and down.
WOOD FLOORS
One of the largest design elements in a new build is the flooring. The main floor that runs throughout the majority of the house will serve as the cohesive link between all of the spaces. Wanting the space to feel fresh, bright and airy, we decided to go with a very light white oak floor. It was definitely a lighter tone than what we were usually specifying in current several projects. It was appealing since it was different but still a classic color- a fresh take. When everyone is doing the same thing, we like to do something different. The selected flooring was also going onto the stairs and throughout the second story so we had a lot of surface area and getting the shade right, was important. It played a big role in the feel for the entire house.
TILE
Tile is one of our favorite materials to select and design with. There is a plethora of tile options out there and we love to source them! Several times tile has been the jumping off point for the design of a room. You can create interest with color, with texture or play with shapes-there really are endless possibilities. We sourced a green embossed tile and immediately knew it has to be an used somewhere in this project. The perfect place for a fun vibrant tile is a powder bath. Powder baths are the best room to have a little fun with! They are small, used by all of your guests and can really show your personality!
We also love the right patterned tile and wanted to incorporate some in a couple of rooms. In the powder bath, we wanted high contrast so we sourced black and white tile options. It was the perfect way to tie to the kitchen design scheme as well. Another area we wanted to play around with a patterned floor was the primary bathroom. A graphic floor makes the space feel more alive and adds a ton of interest. You can also stretch your design dollars here and invest in a cool floor and keep everything else pretty minimal. For this bathroom, we opted to soften the contrast by selecting a tile that is white and gray.
METALS
One finish that often gets overlooked at the beginning of a project is all of the metal finishes that will get incorporated into your project. You have several metal finishes to consider in a new build or larger remodel: plumbing fixtures, light fixtures, mirrors and hardware. We love mixing metal finish colors! There is no hard rule that everything needs to be the same or different metal finishes. We typically stick to 2 finishes per space. In our Urban Modern project, we knew we would be mixing metal finishes to add some variety. We wanted warmer metals to help offset a lot of the black and white going on throughout the house. To achieve this we decided on selecting brass and polished nickel finishes. Polished nickel is the warmer finish of the silver-toned metals and looks great with brass.
We have several months ahead of us for construction and we will walk you through the full process from this planning stage to execution. We are so excited to get started on the project and see this vision come to life!
next up
filed in
leave one here!
comments